
Radio Time Machine
The Challenge
I have a few favorite historic radio broadcasts.
The King’s Speech, delivered by King George VI on Christmas Day in 1939, was a powerful broadcast transmitted across the globe, reaching millions across the British empire and beyond.
News of the attack on Pearl Harbor on December 7, 1941, reverberated through the airwaves, shocking countless listeners. The broadcast of Prime Minister Neville Chamberlain’s declaration of war with Germany on September 3, 1939, marked a somber and resolute moment.
The broadcast of Winston Churchill’s stirring “We Shall Fight on the Beaches” speech on June 4, 1940, exemplified the resilience of the British people.
The challenge I faced was, I wanted to hear those broadcasts, on an old radio, but today, and whenever I wanted to, so I could experience the moments for myself. I decided I could do this fairly simply with an arduino and some nerd know-how.
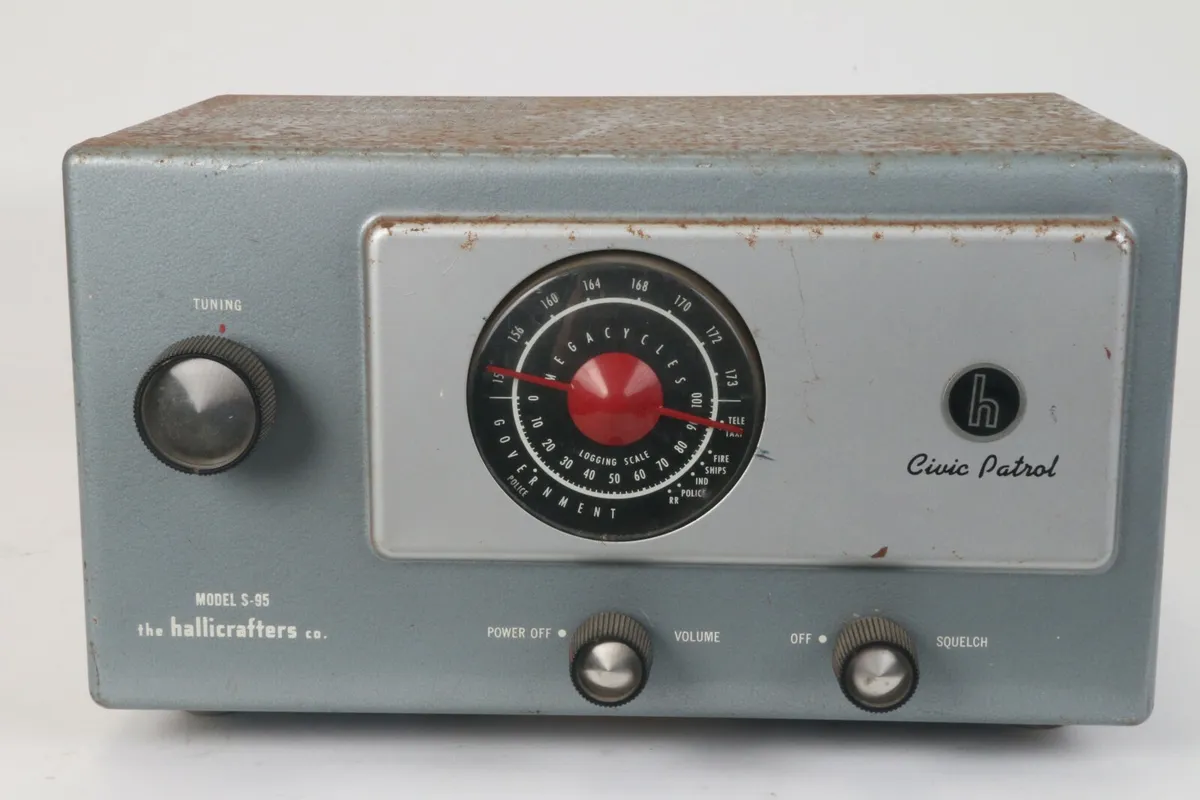
The Radio
The Hallicrafters S-95 Civic Patrol Receiver is a model of radio receiver manufactured by the Hallicrafters Company between 1955 and 1965. This model was part of their line of consumer-grade radios. Be aware, this radio was nonfunctional when purchased, and would gain a second life through this project.
About the Radio
Type: The S-95 is a communications receiver, designed to receive AM and CW (Continuous Wave, used for Morse Code) transmissions.
Coverage: The frequency coverage the receiver spans the standard AM broadcast band and several shortwave bands, allowing users to receive a variety of international broadcasts, amateur radio transmissions, and other signals.
Design: Like many Hallicrafters receivers of its time, the S-95 has a metal chassis, with controls and tuning dials on the front panel and connection points at the rear.
Usage: This “Civic Patrol” radio was marketed for civil defense & public safety use, allowing monitoring of frequencies used by local emergency services & civil defense organizations.
About the Company
Founded in: 1932 by William J. Halligan
Headquarters: Chicago, Illinois, USA
Specialization: Produced radio transceivers, receivers, and other communications equipment.
Market: Served both consumer and military markets.
Reputation: Known for producing high-quality, durable equipment.
The Components
Arduino Uno:
Role: The Brain
Info: The Arduino Uno is the powerhouse of this project, acting as the central control unit. With its easy-to-use platform and versatile nature, it’s like the maestro of an orchestra, coordinating all other components to create harmonious interaction. It’s open-source, accessible, and provides a wonderful entry point for anyone looking to dive into the world of electronics and programming.
LM 386 Amp:
Role: The Power
Info: LM 386 is a power amplifier designed for use in low voltage consumer applications.
Potentiometer Switches:
Role: The Tuners
Info: The potentiometer switches in this project act like the fine tuners of a musical instrument. They allow for the adjustment and control of voltage, effectively modifying the audio output’s volume and tone.
DFPlayer Mini MP3 Player:
Role: The Storage
Info: The DFPlayer Mini is a compact and low-cost MP3 module that can be connected directly to the speaker. It’s the songbird of your project, capable of belting out your favorite tunes or any audio files you feed it with.
Finding the Tracks
I wanted a mixture of iconic broadcasts as well as everyday transmissions, commercials, variety shows, drama, and news bulletins. I also wanted to have a potentiometer-based user interface that would allow an individual to scan through tracks just like you do on a normal radio, and play tracks all from a single decade. Then, when a user turns the switch off and back on, it’s an entirely different decade.
To achieve this, I knew that code would do the real work. However, I also needed to organize the songs on the microsd in such a way as to make it easy to divide decades.
Here are some sources of tracks I used. Overall, I used 700 tracks from 5 decades.
https://www.oldtimeradiodownloads.com/
https://archive.org/details/oldtimeradio
Putting It All Together
Once I had all the tracks and all the components ready to go, the next step was to begin testing and putting together some code.
Once I had the configuration set for the most part, I created a Fritzing pinout diagram and soldered the speaker and potentiometer wires.


