A Flexible System for Findability
Modern life produces a million little things that are purpose-built for their specific task – and replicating their usefulness with something else isn’t always so easy.
In this post, I discuss my philosophy of organizing all the little things in order to actually find the thing you’re looking for when you need it.

Retrievability: The Core of Organization
The most crucial part of organizing is retrievability: being able to find what you need, when you need it.
Beyond Ownership: The Importance of Accessibility: It’s not enough to know you own something—you need to have the ability to access it easily and quickly. Retrievability involves not only how items are stored, labeled, and arranged in your space, but also the ease and speed of finding and accessing any single item at a given time.
First Order Retrievability refers to the ability to access items directly without having to move or manipulate other items first. The order refers to how many layers of organization you need to navigate through to reach your desired item.
Examples of First Order Retrievability would be a wall-mounted pegboard with each tool hanging in a designated location, or door-mounted spice racks in a kitchen with highly visible labels. First Order Retrievability increases efficiency, reduces cognitive load, and (ostensibly) enhances creativity due to the removal of barriers to access tools and information.
It’s important to note here, true First Order Retrievability isn’t always practical or achievable. It’s typically limited first by the amount of space available, and ultimately just how absurd you want to get with your organization.
I typically ensure that the most frequently used tools and materials have First Order Retrievability – usually writing and marking utensils, nail punches, screwdrivers, ratchets, measuring tools (like tape measures, rulers, and digital calipers), my labelmaker, lock pliers, and any and all cutting tools like scissors and utility knives, are front and foremost in my field of view and easily reachable.
First Order Retrievability was popularized by Adam Savage, best known for his work on the TV show MythBusters. In his book “Every Tool’s a Hammer: Life Is What You Make It,” Savage explains this principle in the context of organizing a workshop
Second Order Retrievability would be like needing to move a couple of stacked boxes to get to one at the bottom that has the thing you need.
There’s nothing wrong with Second Order Retrievability, especially if you frequently switch your focus to multiple disparate capabilities in a working session.
Some Other Concepts/Best Practices in Organization
- Only stack like things: Stack similar items together, vertically or horizontally, for order and easy finding.
- Kit your stuff: Keep frequently used items together for efficiency and easy access.
- Keep things so you only need one hand to retrieve them: Ensure items are within easy reach and accessible with one hand.
- Use clear labels: Label boxes, shelves, and drawers for easy identification of contents.
- Accessibility is key: Make frequently used items the easiest to access.
- Vertical space is valuable: Use walls and vertical space with shelves and hanging organizers to save floor space.
- Everything should have a home: Designate a specific place for each item to ensure it’s returned after use.
- If you can’t see it, you won’t use it: Encourage visible and accessible storage for frequent use.
- Limit your palette (Tom Sachs): Use a limited range of materials and colors for a cohesive look.
- One-touch rule: After using an item, put it directly back in its place.
- Routine reset: Reset your space at the end of each day.
- Visible is memorable: Keep important items in sight to prevent them from being forgotten.
Capability: The Driving Force Behind Your Tool and Material Accumulation
Capability refers to the tasks you can perform, each defined by a unique set of tools, materials, and the knowledge required to use them.
Diverse Capabilities Lead to Diverse Tool Collections: As your individual capabilities expand and your skills evolve, so do your tool and material collection. Each capability you develop creates its own ecosystem of tools. For instance, a home automation enthusiast might accumulate a variety of sensors and microcontrollers. But when they decide they want to also develop the capability of framing archival documents or artwork, there might not be a lot of overlap of tools between those 2 capabilities.
Skill Advancement Drives Tool Specialization: Additionally, as your advancement within any single capability grows, so do your tool needs. Also, those tools become more specific. A beginning framer may start with a basic miter and mat cutter, but as they progress, they’ll want to have a wide selection of mat types and colors, different ways of cutting and joining frames, and a selection of tools for properly mounting artwork.
Many tools will also serve multiple capabilities. A multimeter, for example, is crucial for electronics work but also home improvement projects.
Limitless Capabilities Require Flexible Storage Solutions: As you branch into new areas, you not only acquire new tools but often need to store materials and projects in progress. This expansion demands a flexible storage system.
The Organizational Challenge
This growing number of tools and materials necessitates the development of a scalable, flexible organizational system that can adapt to various capabilities.
An effective system needs to handle both tools specific to a single capability and those used across multiple capabilities. It should organize tools and materials efficiently, ensuring everything has its place, is easily accessible, and logically categorized.
Key Features of an Effective Organizational System
Based on these principles of retrievability and capability, here are the key features I’ve found essential in creating an effective organizational system:
- Flexibility: It should adapt to different types of tools and materials across various capabilities.
- Scalability: The system needs to accommodate an increasing number of items as your capabilities expand.
- Accessibility: Items should be stored in a way that makes them easy to find and retrieve quickly.
- Categorization: Clearly categorize tools and materials by specific tasks or shared use.
- Labeling: Clear labeling helps to quickly identify items.
- Modularity/Reconfigurability: The system should allow for easy reconfiguration as your needs and capabilities change.
- Durability: It should be built to last and handle heavy or delicate tools/materials.
- Clean: Workshops are dirty – a good system should keep tools and materials clean when necessary.
- Optimal Use of Space: The system should make the most of available space without overcrowding or losing easy access to items.
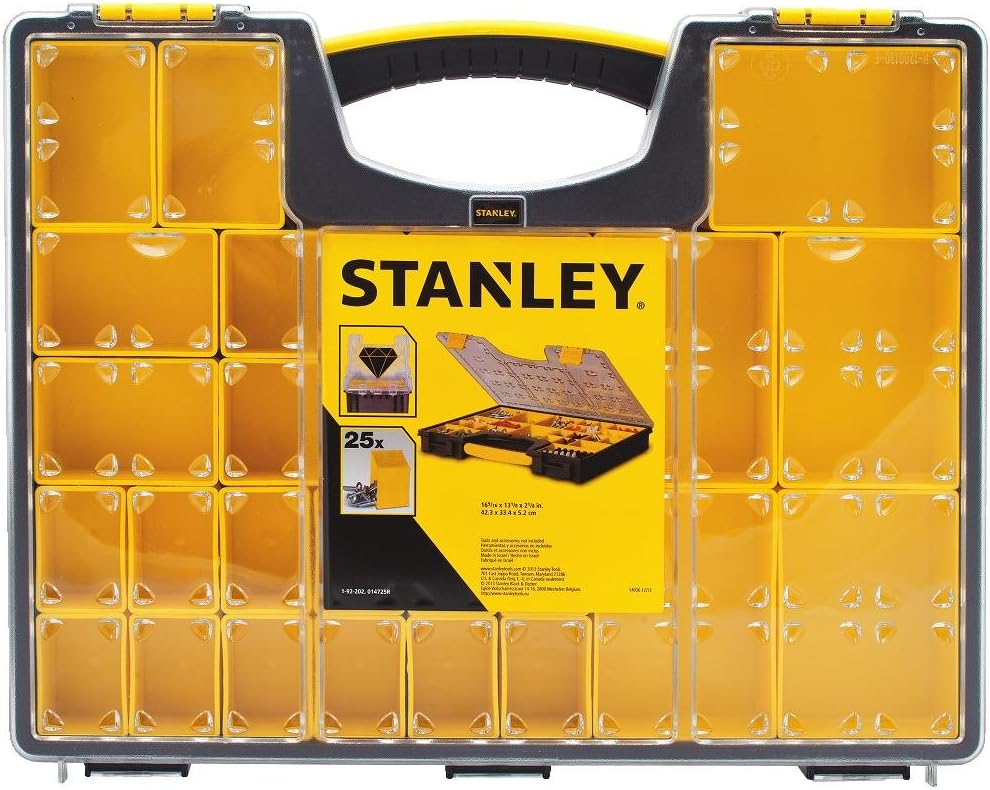
The Stanley® 25 Compartment Organizer 014725R
When it comes to organizing small tools, components, and materials, the Stanley® 25 Compartment Organizer (014725R) is my top choice. Check it out here.
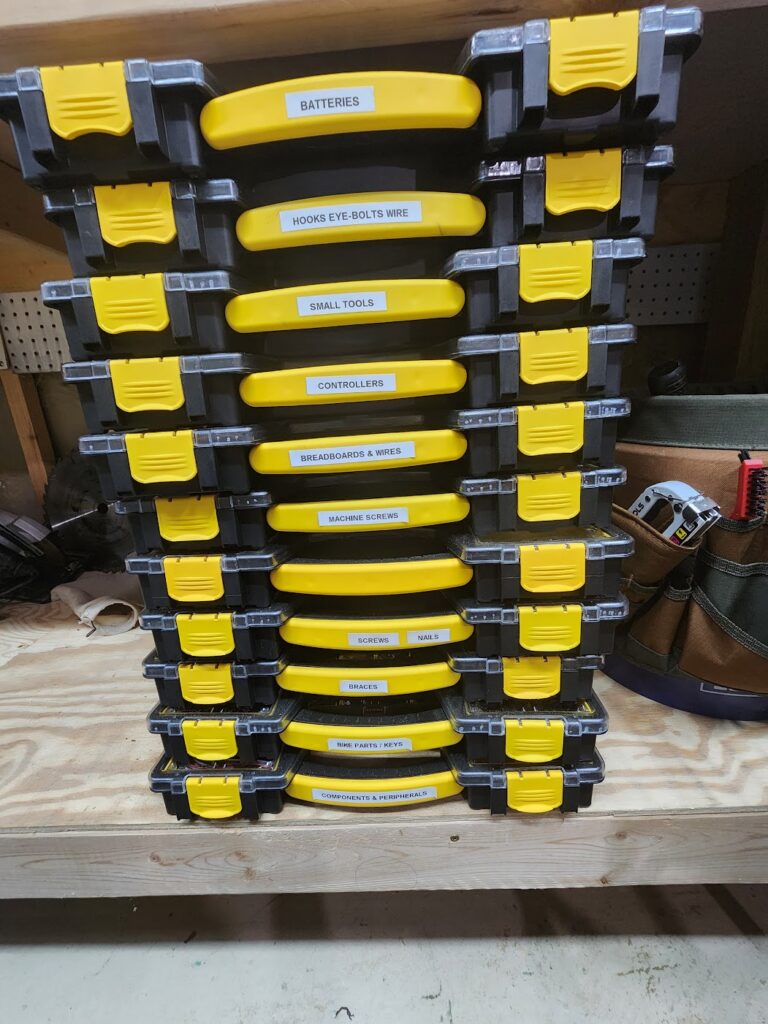
Its design allows the sorting of items into multiple bins, making it incredibly easy to categorize everything and find what you need at a glance. It also allows additional bin configuration when needed.
Custom 3D-Printed Bins for Added Flexibility
The stock bins are durable, but 3D printing custom sizes offers optimal flexibility. The 1.5-mm walls of these prints suit various materials.
Filaments and Print Settings
Depending on your needs, you can use ABS, PETG, or even more exotic filaments if you want to experiment, but PLA works just fine.
Color-Coding Filament: You can create bins in different colors, making it easier to color-code your storage system, but keep them as light as color as possible, or it’s easy to not be able to easily see the thing you’re storing.
If you’re going for the classic Stanley® yellow, Coex LLC’s Taxicab Yellow PLA is a near perfect match to the original bin color.
3D Printer Settings: For optimal results, use a 0.40-mm nozzle (or smaller) due to the small features used when assembling the bins. A 0.20-mm layer height works well for this project, offering a balance between speed and detail.
Sizes and Layout
The internal layout of the Stanley® 25 Compartment Organizer is divided into a grid of 48 rectangles. The bins are customizable based on this grid, with sizes labeled according to the grid’s dimensions. For example:
- A 1×2 bin is one rectangle wide and two rectangles high.
- A 2×1 bin is two rectangles wide and one high. Keep in mind that because the grid is rectangular, a 1×2 bin and a 2×1 bin are not the same.
The two striped, 2×1 areas in the diagram cannot be subdivided into single 1×1 bins due to the Stanley® design. These areas can accommodate larger bins, such as 3×1 or 2×2, but cannot be split.
The two peninsulas at the top of the diagram that surround the organizer’s handle are rotated 90 degrees, so while they can each be filled with 1×1, 1×2, 2×1, or 2×2 bins, they cannot be joined with the rest of the organizer unless using a custom bin to account for the geometry transition.

The Custom Bin 3D Printer Files (*.stl)
| Grid Size | Download Link | Cavity (Width x Height x Depth) | Special Features |
| 1 x 1 | Download | 35.00 x 24.25 x 39.50 mm | 2 cavities, R 10 mm filleted bottom |
| 1 x 1 | Download | 35.00 x 50.00 x 39.50 mm | |
| 1 x 2 | Download | 35.00 x 105.00 x 39.50 mm | |
| 1 x 3 | Download | 35.00 x 160.00 x 39.50 mm | |
| 2 x 1 | Download | 75.00 x 50.00 x 39.50 mm | |
| 2 x 2 | Download | 75.00 x 105.00 x 39.50 mm | |
| 2 x 3 | Download | 75.00 x 160.00 x 39.50 mm | |
| 3 x 1 | Download | 115.00 x 50.00 x 39.50 mm | |
| 3 x 2 | Download | 115.00 x 105.00 x 39.50 mm | |
| 3 x 3 | Download | 115.00 x 160.00 x 39.50 mm | |
| 4 x 1 | Download | 155.00 x 50.00 x 39.50 mm | |
| 4 x 2 | Download | 155.00 x 105.00 x 39.50 mm | |
| 4 x 3 | Download | 155.00 x 160.00 x 39.50 mm | |
| 5 x 1 | Download | 195.00 x 50.00 x 39.50 mm | |
| 5 x 2 | Download | 195.00 x 105.00 x 39.50 mm | |
| 5 x 3 | Download | 195.00 x 160.00 x 39.50 mm | |
| Feet | Download | Set of four feet for one bin |
Assembly of Custom Bins
- Print the bin shells and feet (4 feet per shell).
- Use cyanoacrylate (CA) glue for PLA parts.
- Don’t use accelerator, it can dry too fast.
- Gluing steps:
- Turn the bin upside down.
- Put a drop of glue in each foot socket.
- Use tweezers to place feet in sockets.
- Push feet down and toward the center for a good fit.
- Let the glue dry completely before using the bins.
Storing Your Organizer Cases
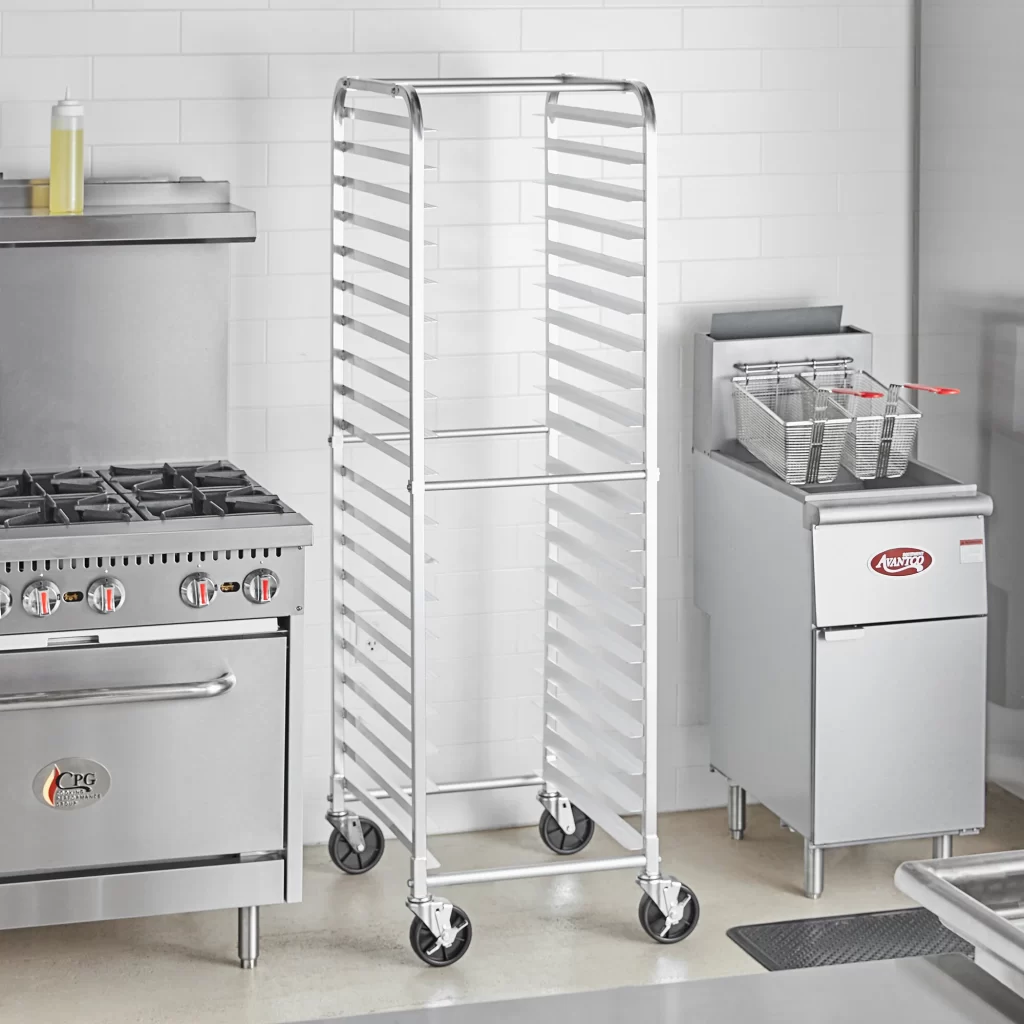
You’ll need somewhere to store your bins. Ideally it should be upright, lightweight but sturdy, and easy to move around. I recommend this industrial baking pan rack.
Benefits of the Baking Pan Rack Solution
- Maximizes Vertical Space: By utilizing vertical storage, you can free up valuable floor space in your workshop or garage. This is especially useful in smaller workspaces where every square foot counts.
- Mobile Organization: With the option to add wheels, this rack becomes a mobile powerhouse of organization. Easily move your parts and components to where you need them, then roll them back out of the way when you’re done.
- Easy Label Visibility: The tiered design of the rack allows you to clearly see the labels on each organizer case.
- High Capacity: With the ability to hold 40 standard cases, this rack provides ample storage for even the most well-stocked makers.
- Customizable: The DIY nature of this project means you can adjust and customize it to fit your specific needs and space requirements.
What You’ll Need
- This Baking Pan Rack: https://www.webstaurantstore.com/steelton-20-pan-end-load-bun-sheet-pan-rack-unassembled/109RACKECON.html?srsltid=AfmBOoofJfhTTevJoGtkBBP45WrBVcBtzyn6FApZM6EHZCeE2-84WTw1
- Hardware:
- 4x M10 x 50mm bolts (for lower cross-members)
- 8x M6 x 25mm bolts (for upper cross-members)
- M10 and M6 washers
- Fender washers (various sizes)
- Blue Loctite
- Tools for assembly
Assembly Tips
- Choose the right hardware: Opt for zinc-plated hardware instead of stainless steel. This prevents galvanic corrosion when threaded into aluminum.
- Customize for fit: The exact measurements may vary depending on your rack model. Don’t be afraid to adjust spacer heights and bolt lengths as needed.
- Secure it: Use blue Loctite during final assembly to prevent loosening over time.
- Future-proof it: If you might add wheels later, consider how that will affect your assembly now.
Step-by-Step Assembly
- Start with the lower cross-members:
- Use the M10 x 50mm bolts
- Add washers under the bolt heads (fender washers are great for distributing force)
- Use fender washers as spacers to create a 17-18mm gap for each cross-member
- Move to the upper cross-members:
- Use the M6 x 25mm bolts
- Again, add washers under the bolt heads
- Use 18mm OD fender washers as spacers, aiming for a 12-15mm stack per cross-member
- Test fit everything before final assembly
- Apply blue Loctite to the bolts during final assembly
- Tighten everything securely


